Configuration
Account


When starting the app, you can choose which server the app uses. Your account lives on that server. By default, it uses lanternpowermonitor.com which is hosted in a data center here in Kansas City free of charge. If you choose to use the Pi Hosted or Self Hosted options (described here) the google sign in option won't be available. After choosing your server, create an account.
Panels


After logging in for the first time, you'll be prompted to build your breaker panels. This should be done even before you have hardware. Designing your panel in the app will make it easier to know how many hubs and CTs you need to purchase. As you set the number of spaces in your panel, the size of the panel will update and redraw automatically.


Select each space in the panel and set its parameters. You can use the description field to keep a complete list of everything attached to the breaker. The "amperage" field is where you set the size of the CT that you're putting on the breaker wire. This field is used to calibrate the readings, so it's important that you enter the size of the CT and not the size of the breaker.
Double pole breakers are a special case. Most of them have equal usage on both poles of the breaker, so there's no need to monitor each of them individually. We can use one CT on one side of it and simply double the output in software. Using two CTs and monitoring both poles separately will guarantee a more accurate reading, but if you want to save money on CTs, choose "Double Pole (240V) One CT Doubled.


The "Solar" option designates a breaker as being one that produces electricity rather than consuming it. The current transformers can be installed in either orientation and the power measured is forced to be positive or negative based on this "Solar" checkbox.
Bill of Materials


From the main menu in the app, you can choose "Generate Bill of Materials". This will create a CSV that you can download and open which lists every piece of hardware that you need to buy to assemble your own hub as well as the exactly quantity and model number of current transformers that you'll need to purchase.
Breaker Grouping


Choose "Configure Breaker Grouping" from the main menu. By default every breaker gets put into its own group when it's created. Both poles of a double pole breaker get put into the same group, even if you're only monitoring one pole.
When you choose to add a new group, it will be added as a subgroup to the current selection. Using this, you can create a hierarchy as many levels deep as needed.


After your new group is created, select the group or breaker that you want to move into it and choose "Re-Parent". Select your new group as the new parent and the hierarchy will update after saving.
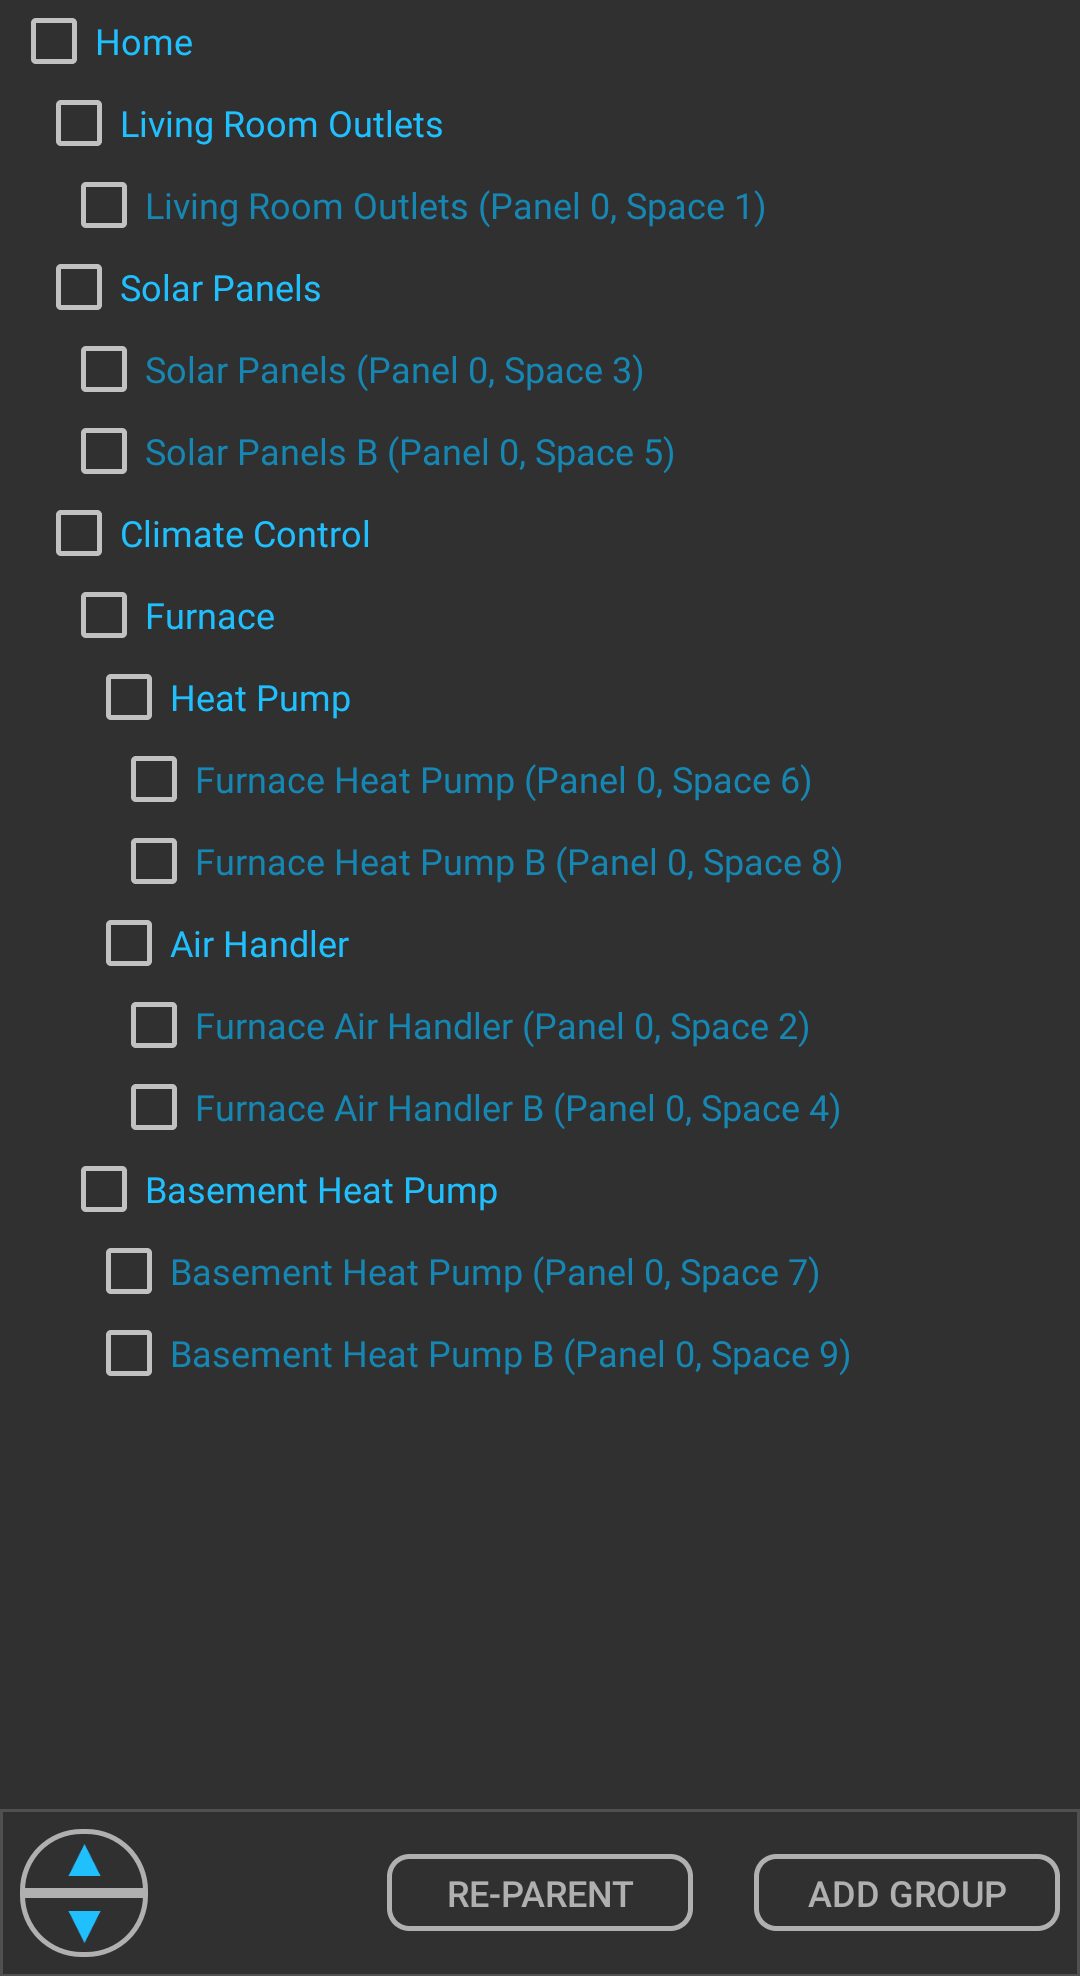

Repeat these steps until you have the hierarchy built the way you want it. All of the aggregations of kWh totals and instantaneous power will update immediately when you go back to the main page.
Billing Rates


You can create as many billing rates as needed to completely describe the billing plan of your power company. As power is monitored, Lantern will figure out which rates apply based on the date, which way power is flowing (from the grid or to the grid), the time of day, and how much power you've consumed from the grid so far this month.


This is an example of having different rates for consuming from the grid or supplying to the grid which you would do if your company does not have net metering.


Here is an example of applying a billing rate to only a certain part of the year. Some power companies have different rates for summer vs winter. In this case, we select "Recur Annually" so the rate doesn't have to be recreated every year manually.


The last example is for applying a rate to a specific time of day. After saving your billing rates, they will be applied historically for the date ranges that they impact. This could take a couple of minutes depending upon how much data you have stored in the Lantern server. After the billing data has be recalculated, it will be available in the main view by selecting the currency button.