Installation
Disclaimer
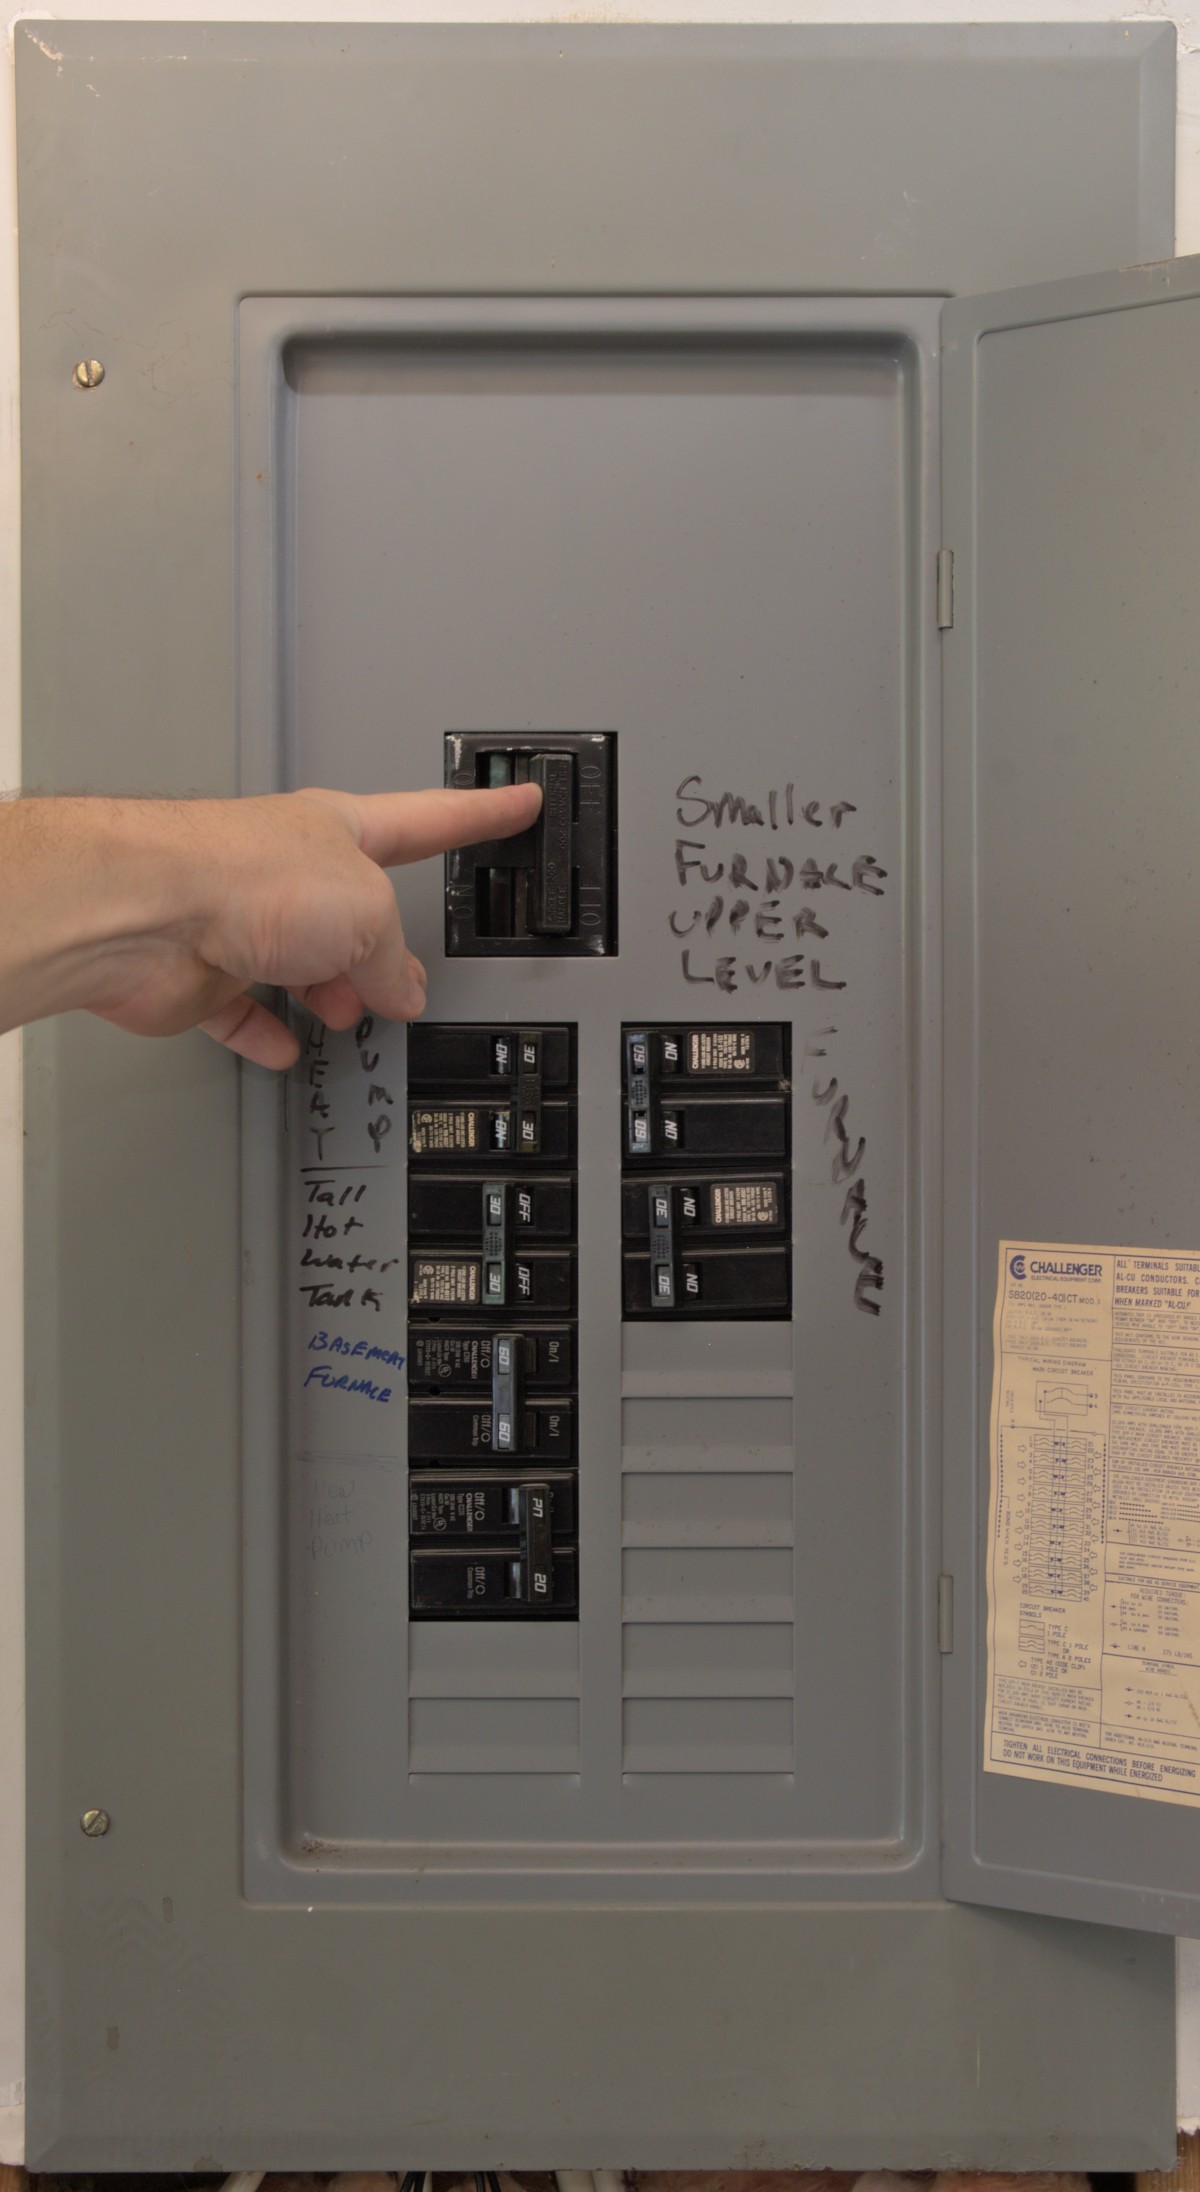 Before opening the panel, make sure to shut off the main breaker. Even after shutting off the main breaker, the lines coming in are still live unless the meter is pulled. Be extremely careful and stay away from those mains.
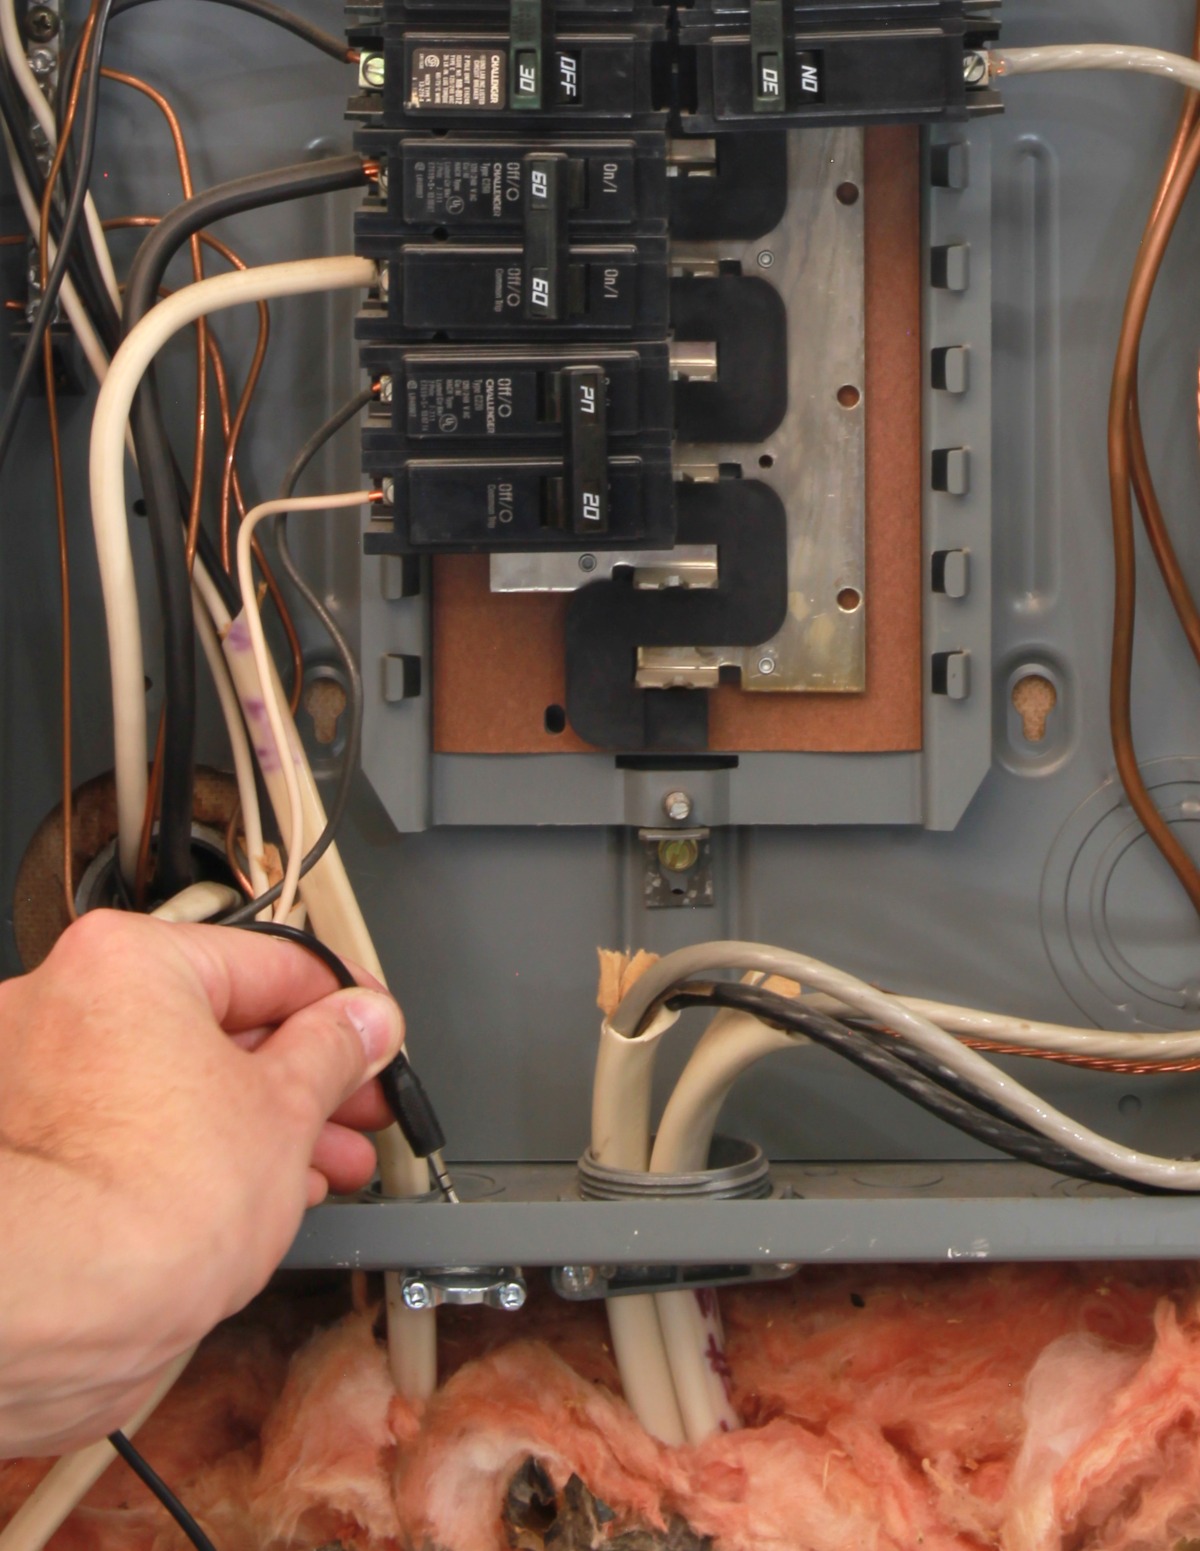 Choose a current transformer that matches the size of the breaker you will track. Hubs should be mounted outside of the panel, so route the headphone jack for the CT through a punchout in the case of your panel and connect it to a port on the hub. Even though the CTs have a burden resistor built in for protection, you should connect the headphone jack to the hub before installing the CT on the breaker wire.
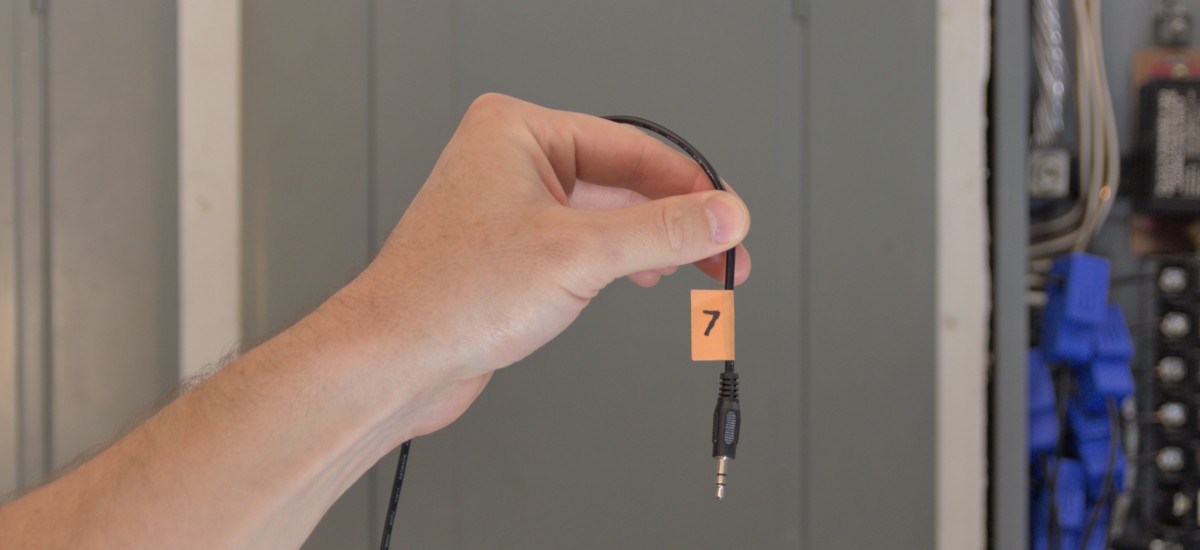 It's a good idea to put some masking tape on the CT and label which space the CT is connected to. This way if you need to move things around on the hub ports, you'll know which CT to disconnect from the breaker wire without having to trace the wire all the way back from the hub.
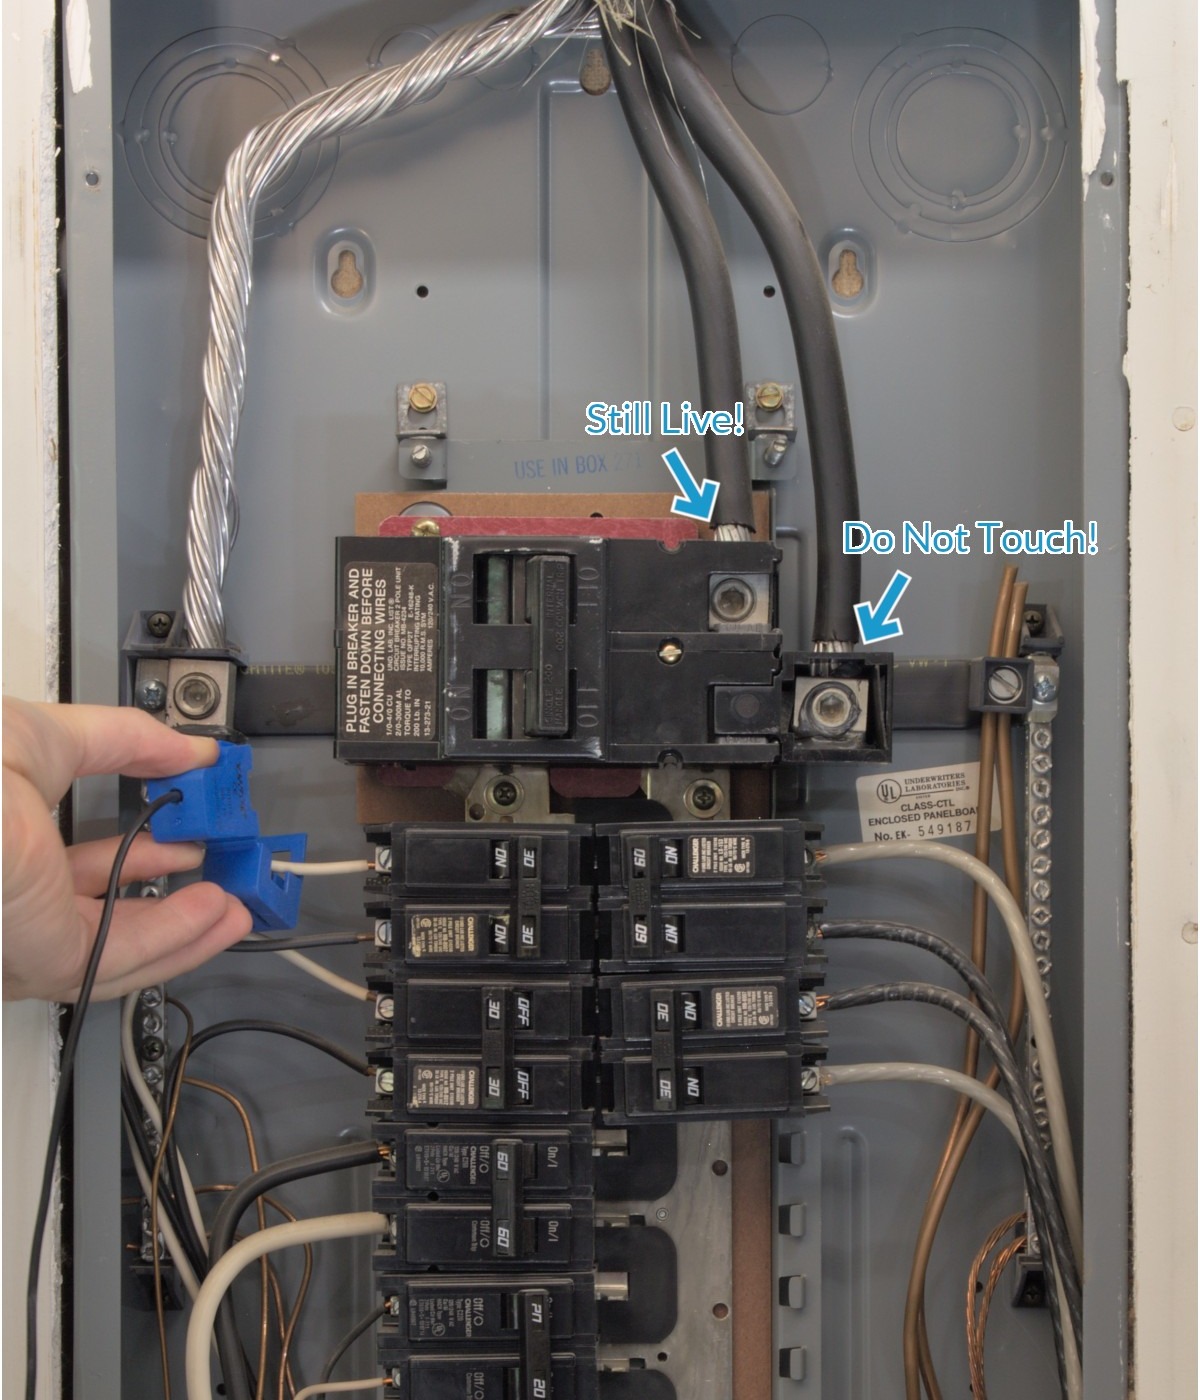 Now you can install the CT. Open up the CT and put it around the wire coming out of the breaker. The CT can go either direction so choose whichever way is easier.
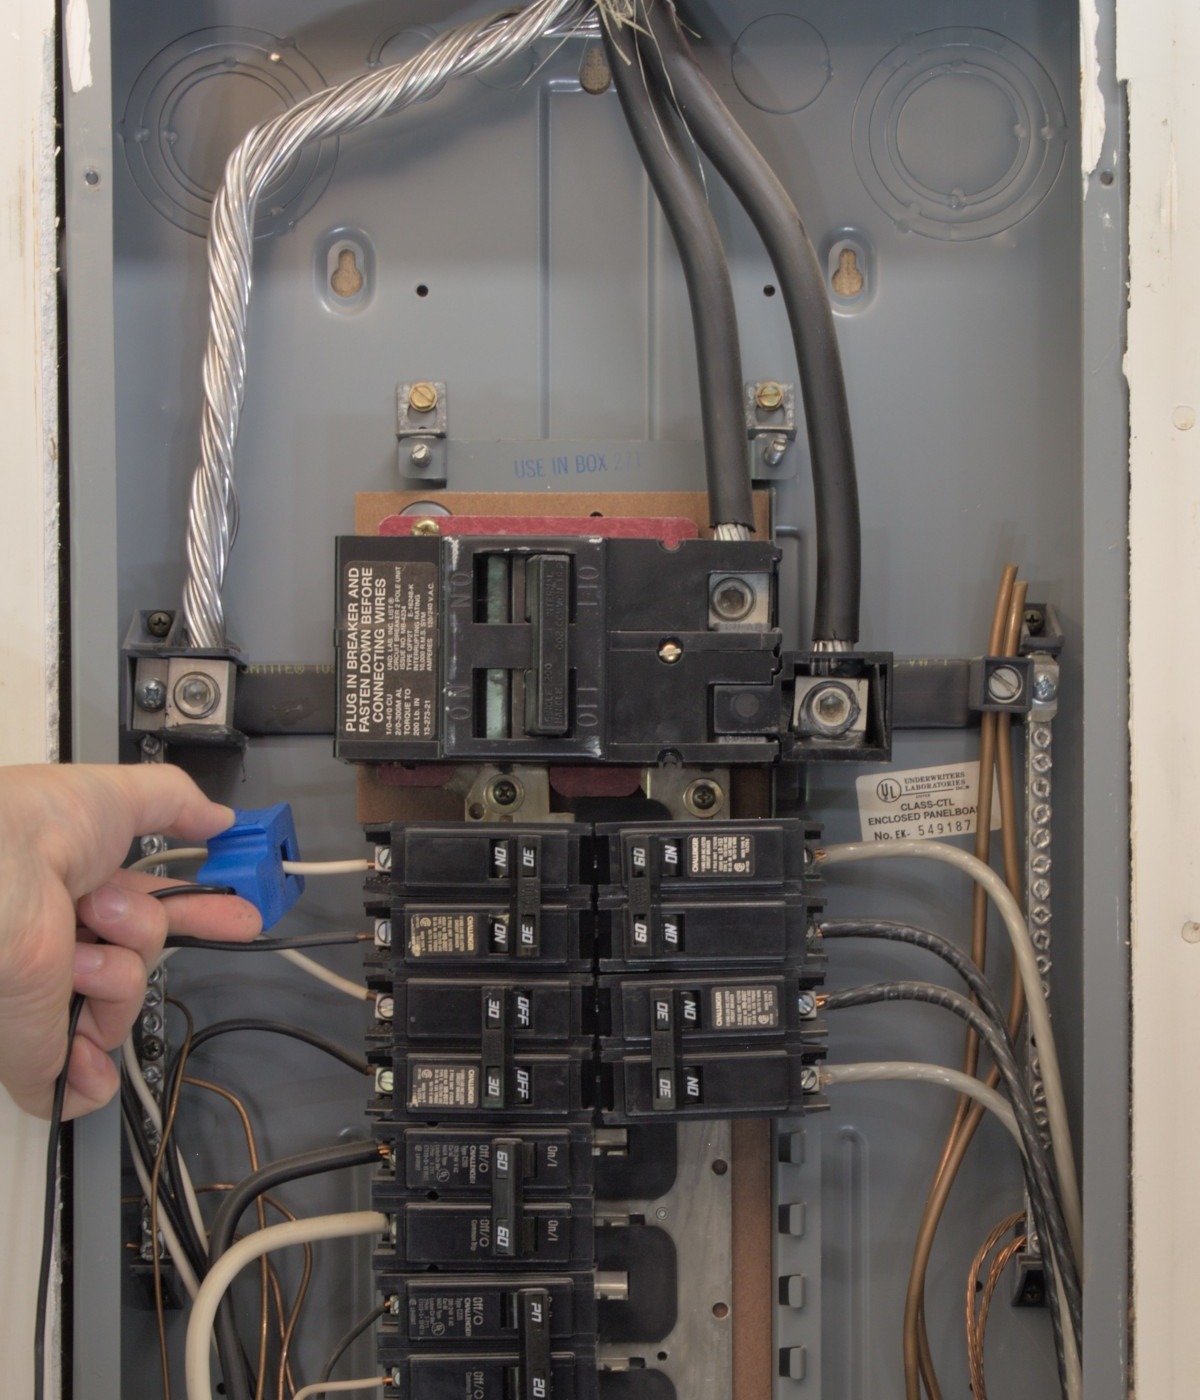 Snap the CT closed. Make sure the wire goes in between the magnet before you snap it closed to avoid damaging the CT.
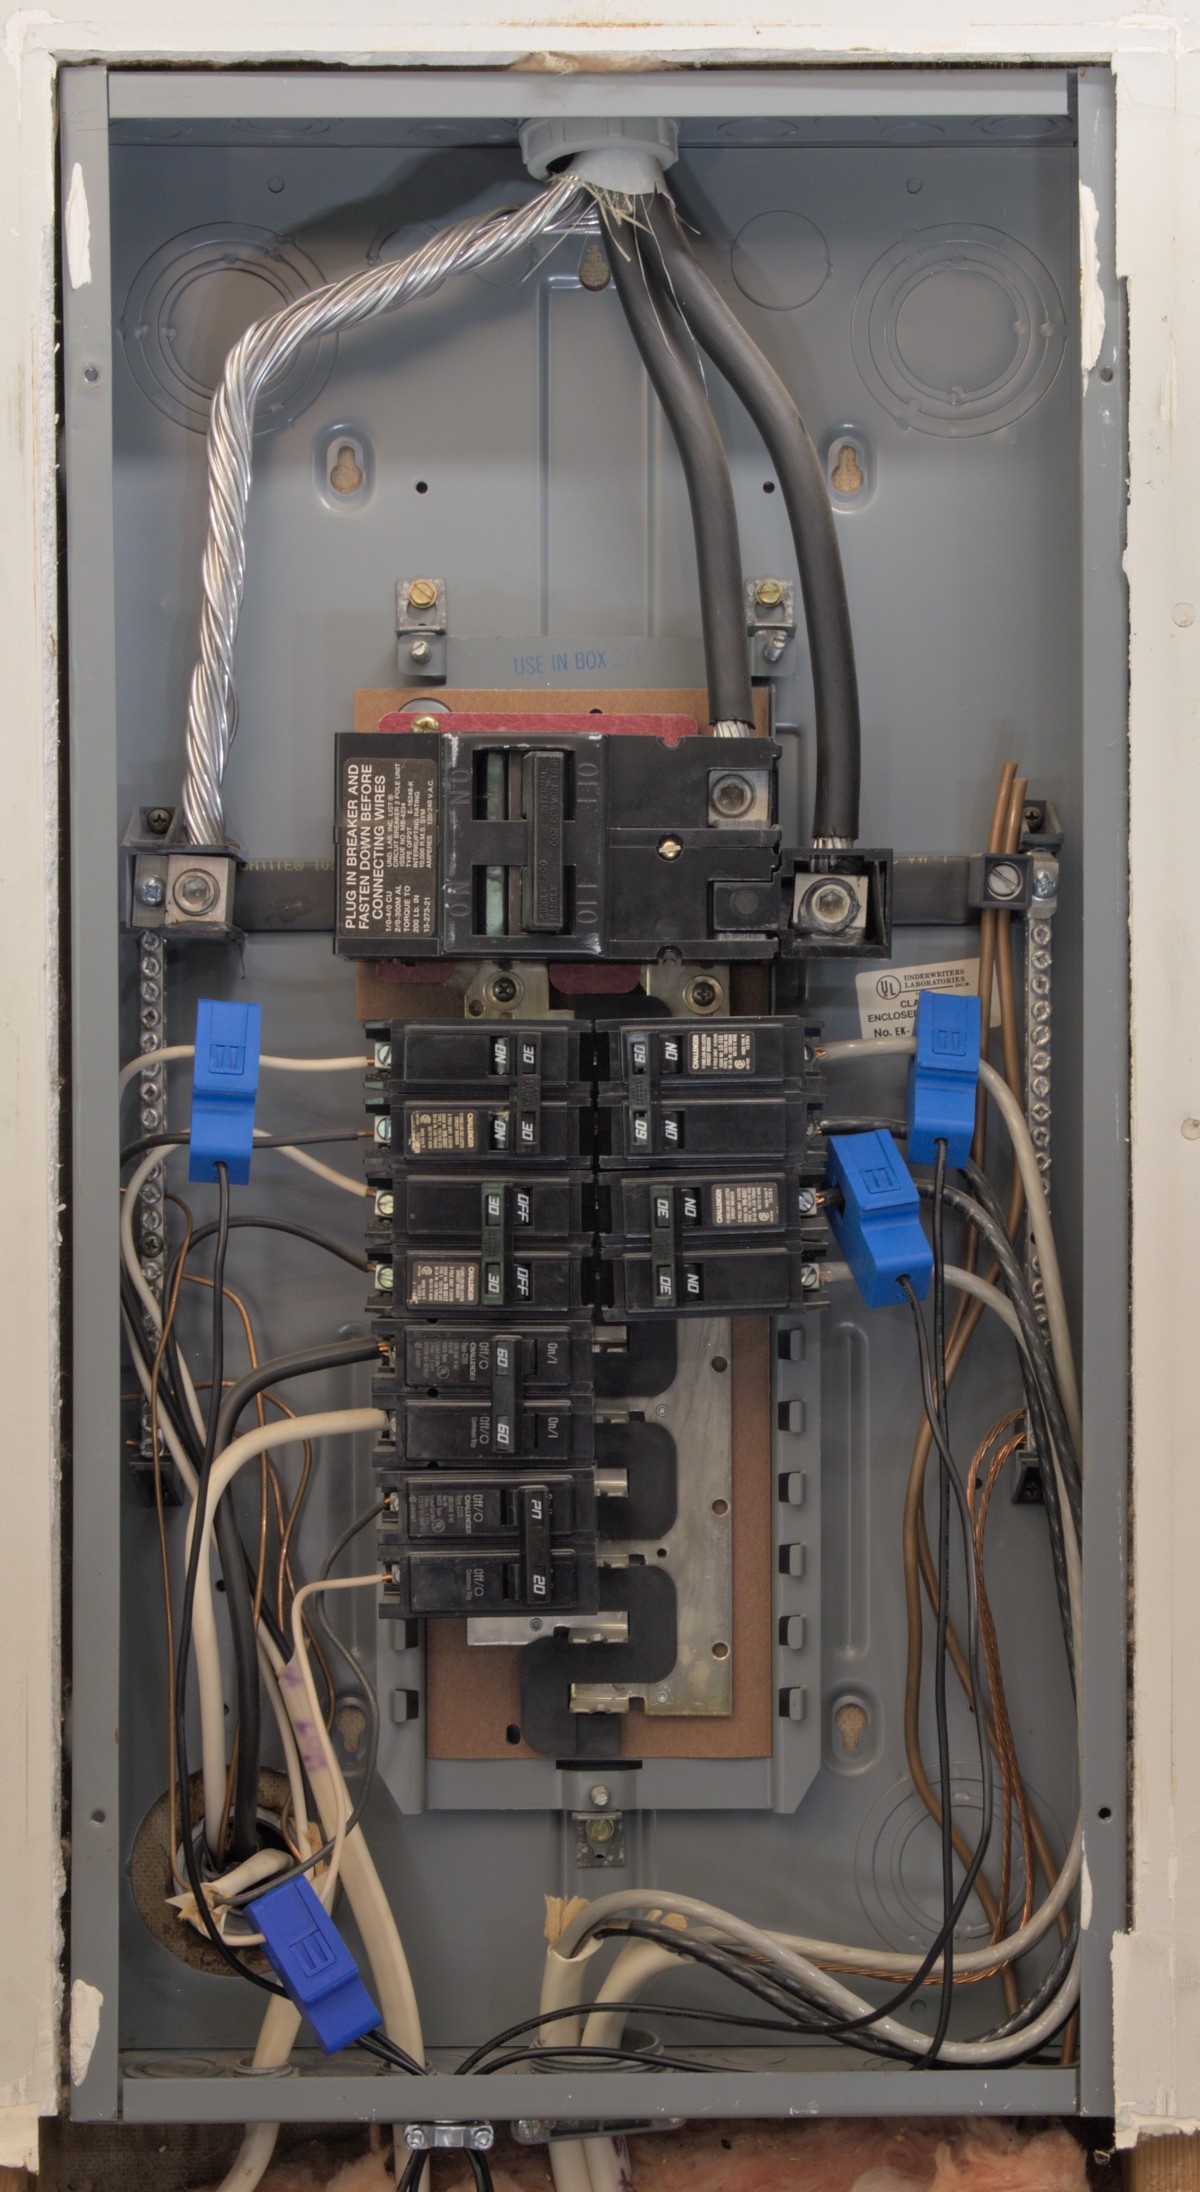 Repeat the process until all of the breakers you're choosing to monitor have CTs on them.
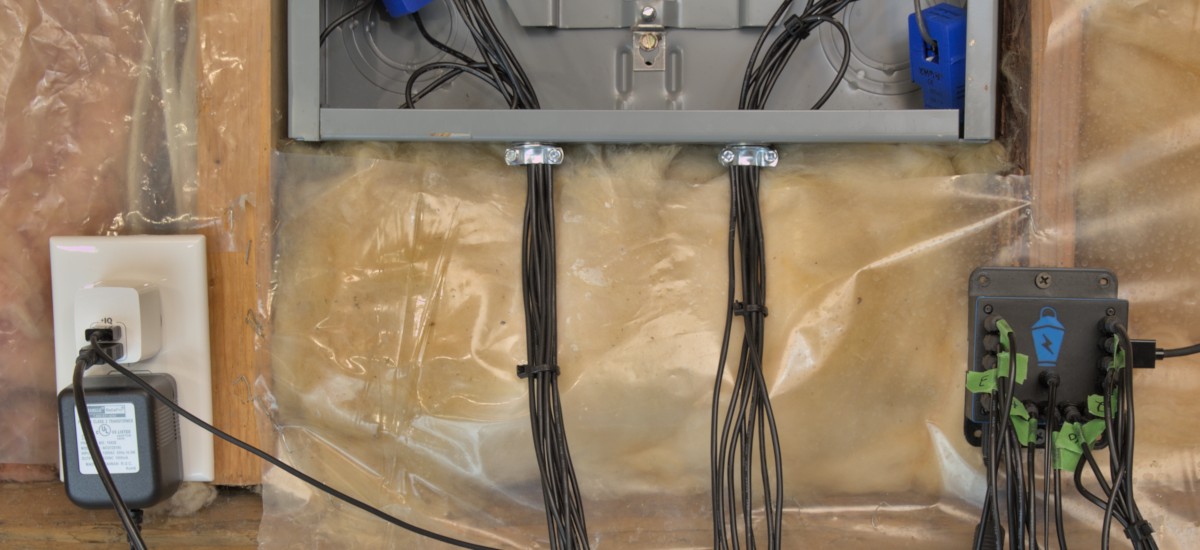 The voltage transformer and power for the Pi need to be plugged into a nearby power outlet. If there isn't already one near your panel, you can install a new breaker in the panel and run power to a power strip, or to a new outlet. If you're using the flanged case, it can easily be mounted to the wall near the panel.
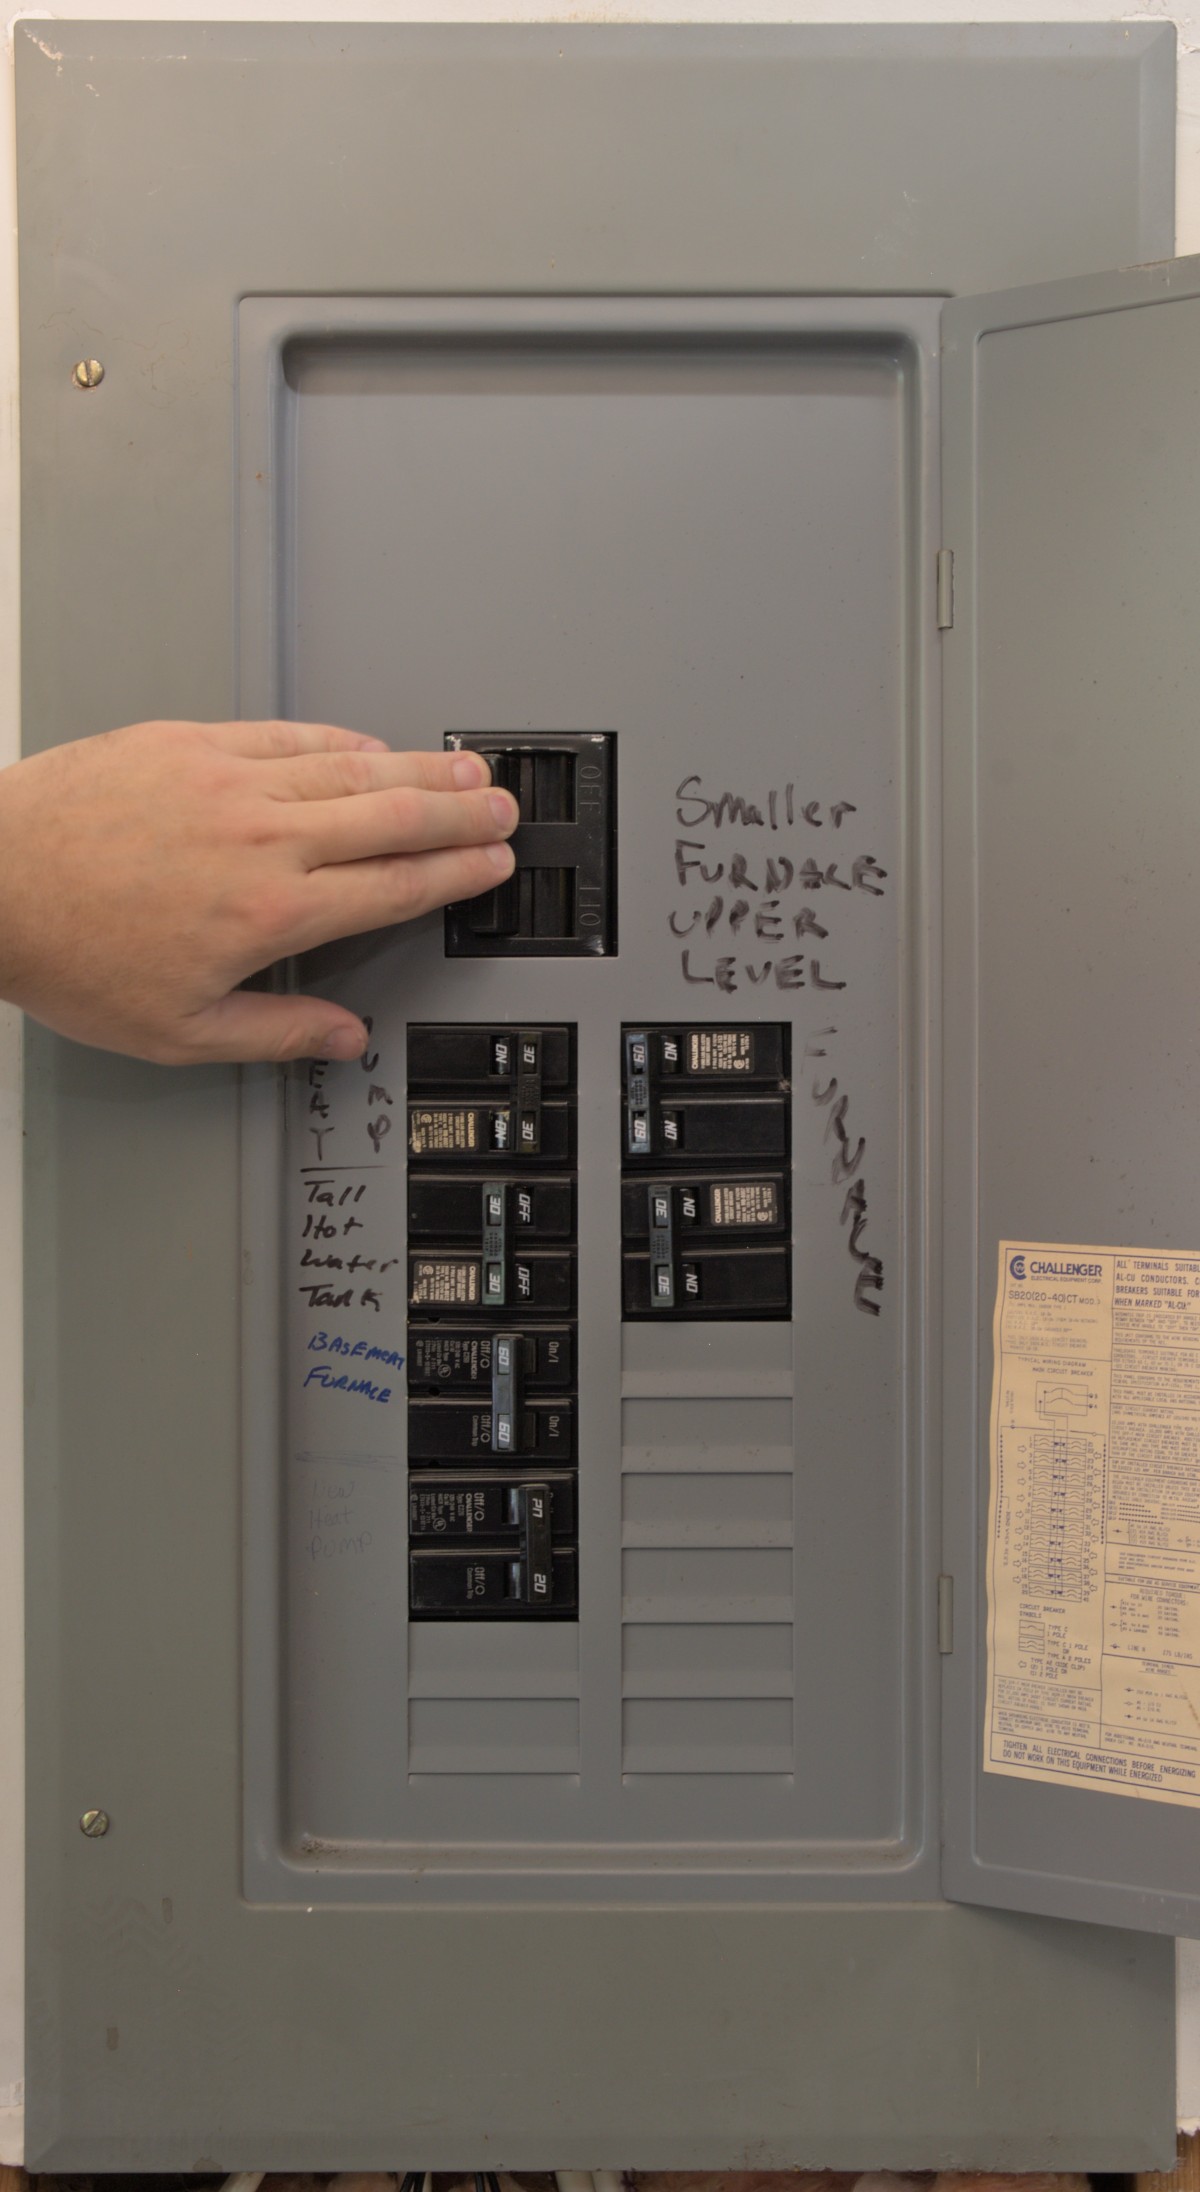 After putting the cover back on your panel, turn the main breaker back on.
Hub Adoption
The next step is to add your hubs. To get the hub running, you'll need an SD card flashed with the latest software image which can be downloaded here. You can flash it to a microSD card using Balena Etcher.
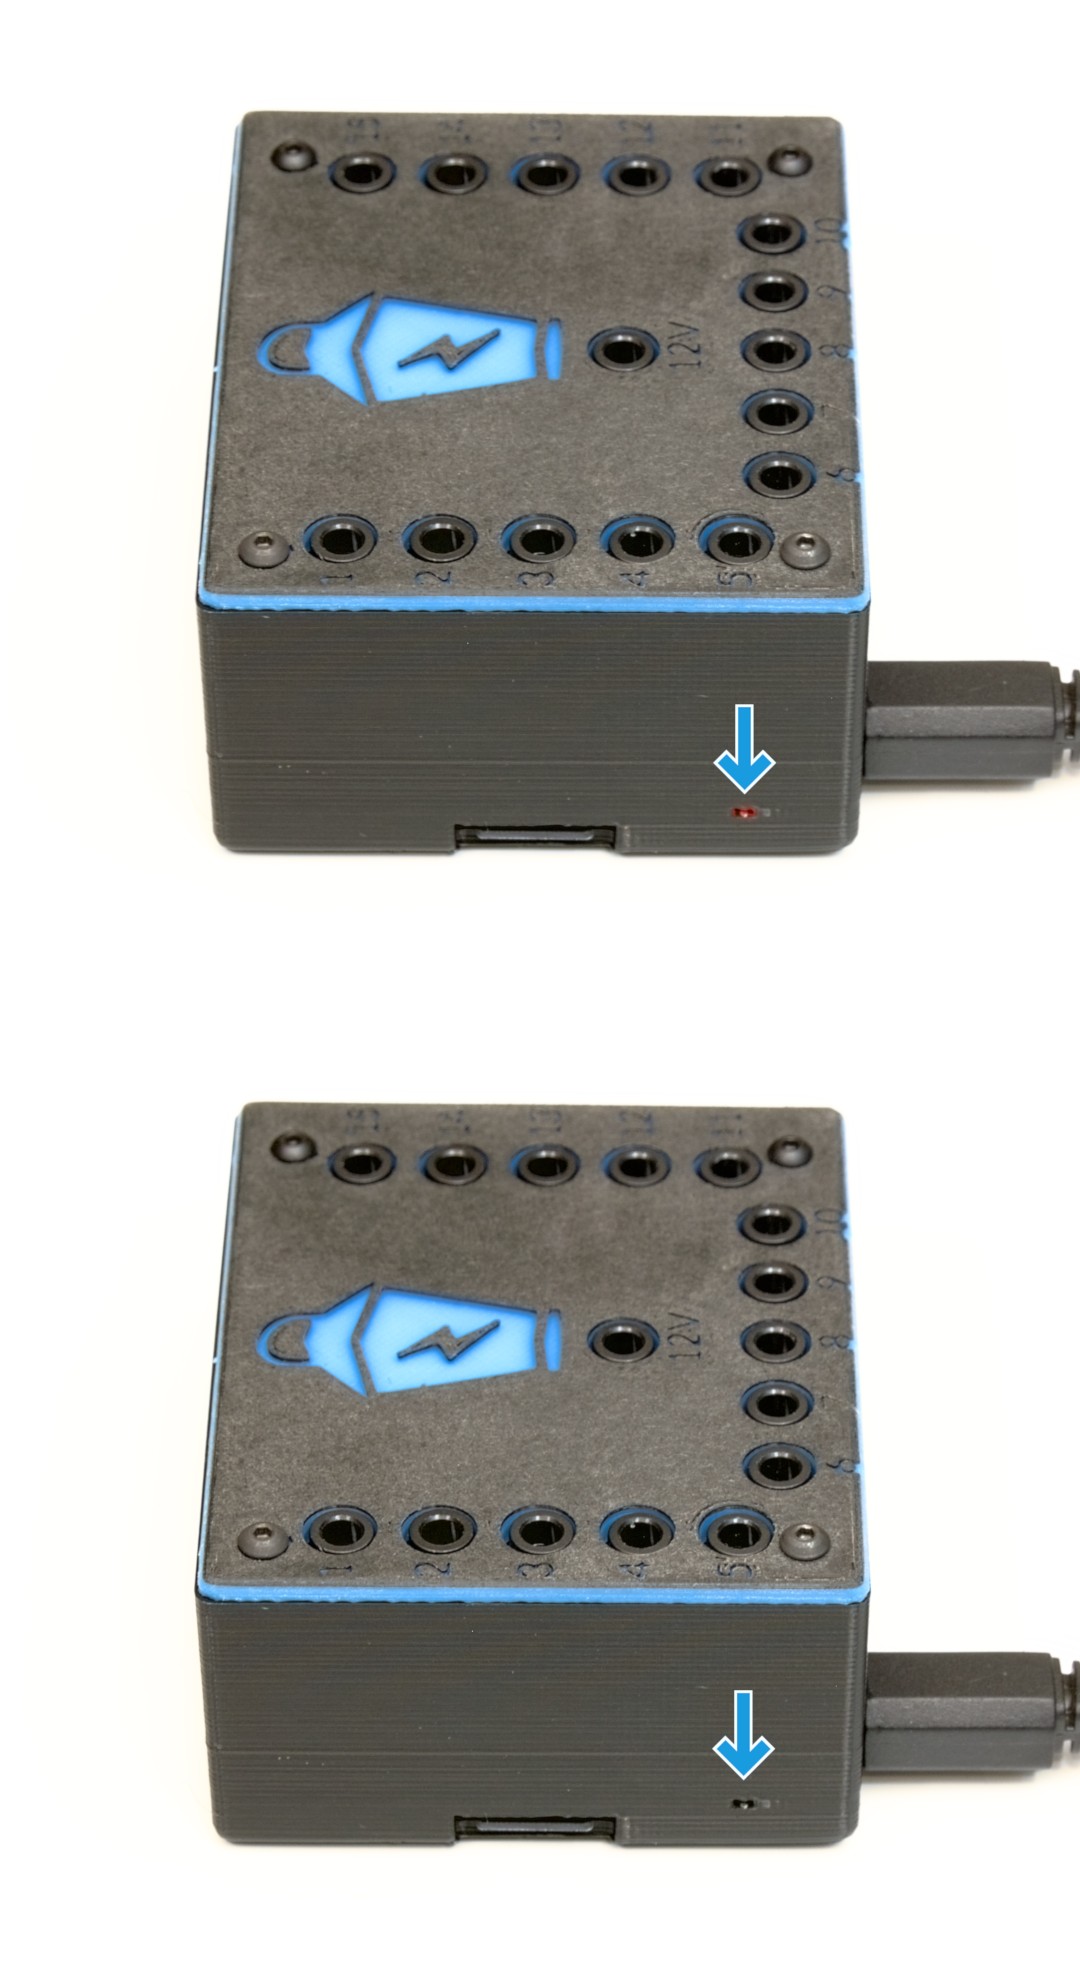
When you power on the hub with this SD image, the power light will stay on for about a minute. When the light stays off, that means the service has started and is advertising itself via bluetooth. You can now scan for the hub in the app.

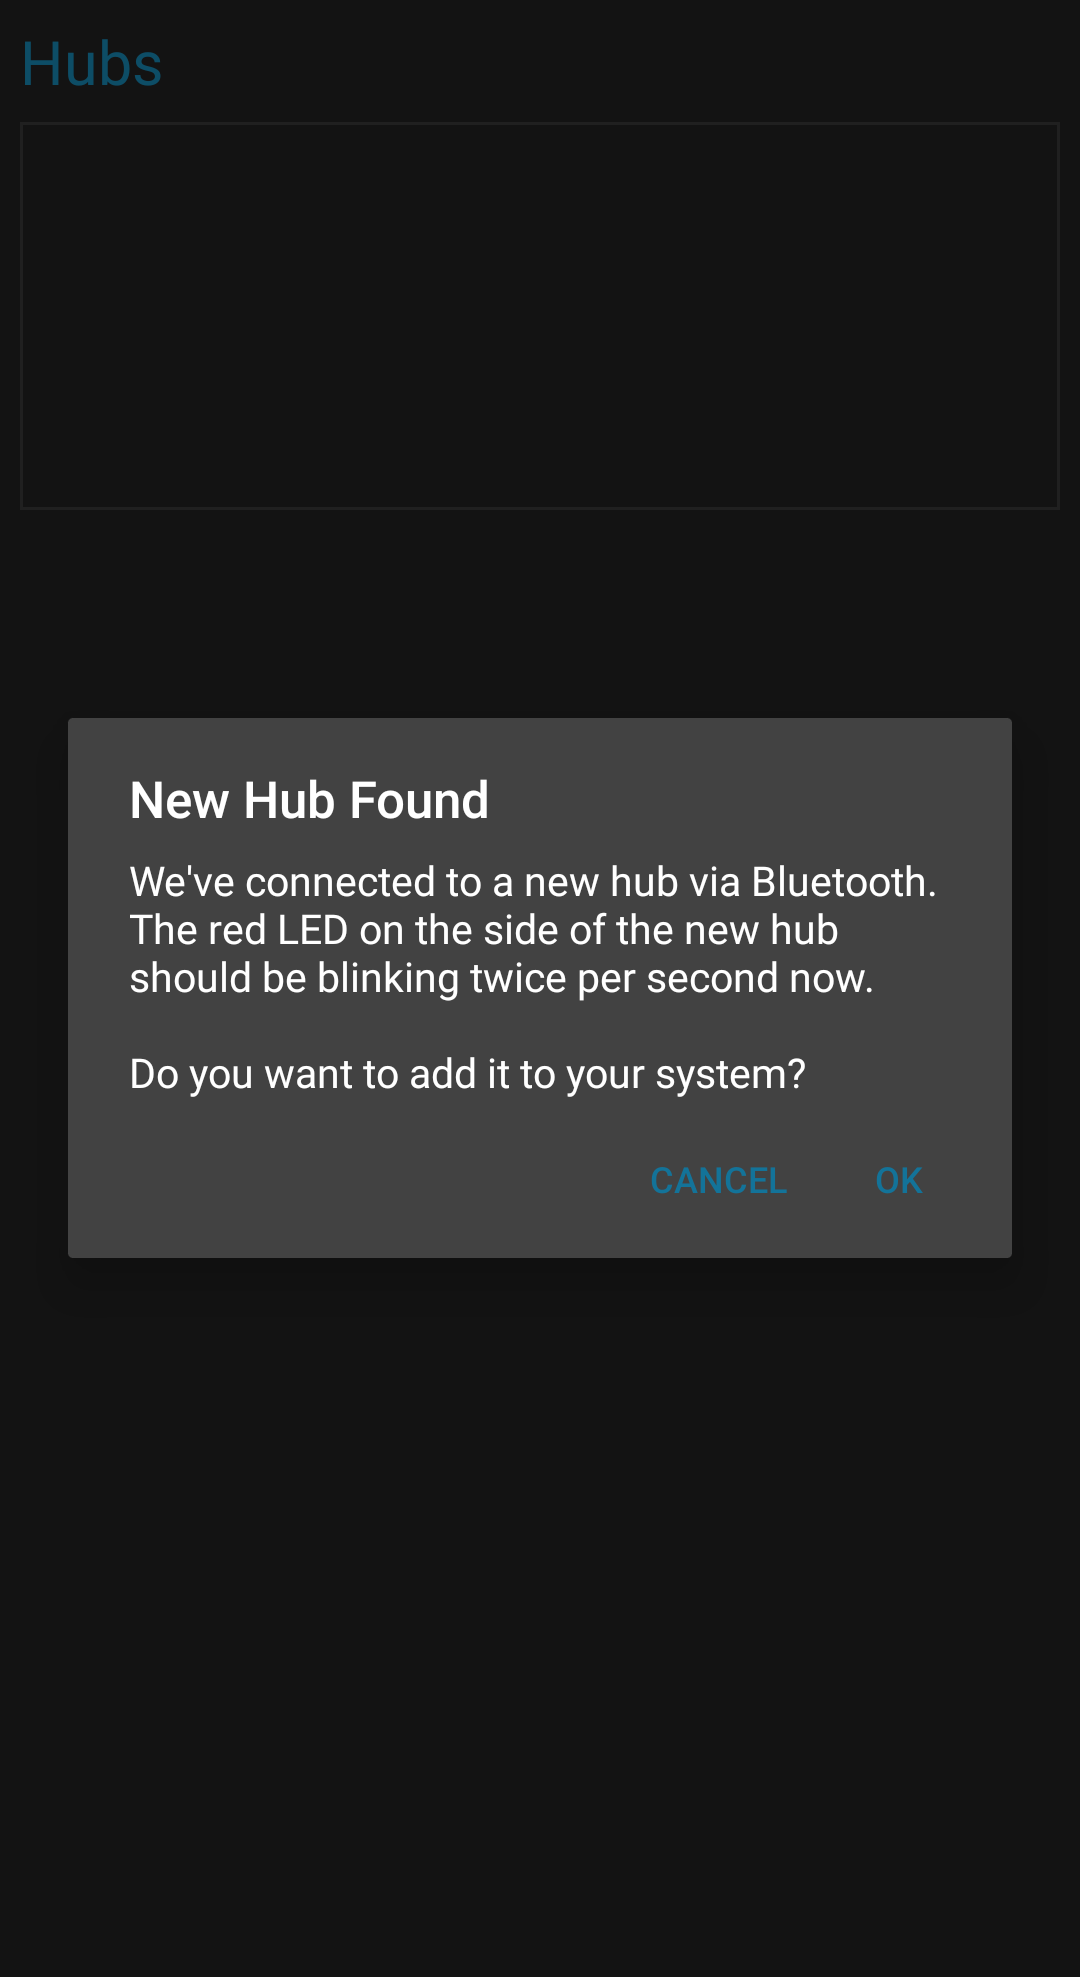
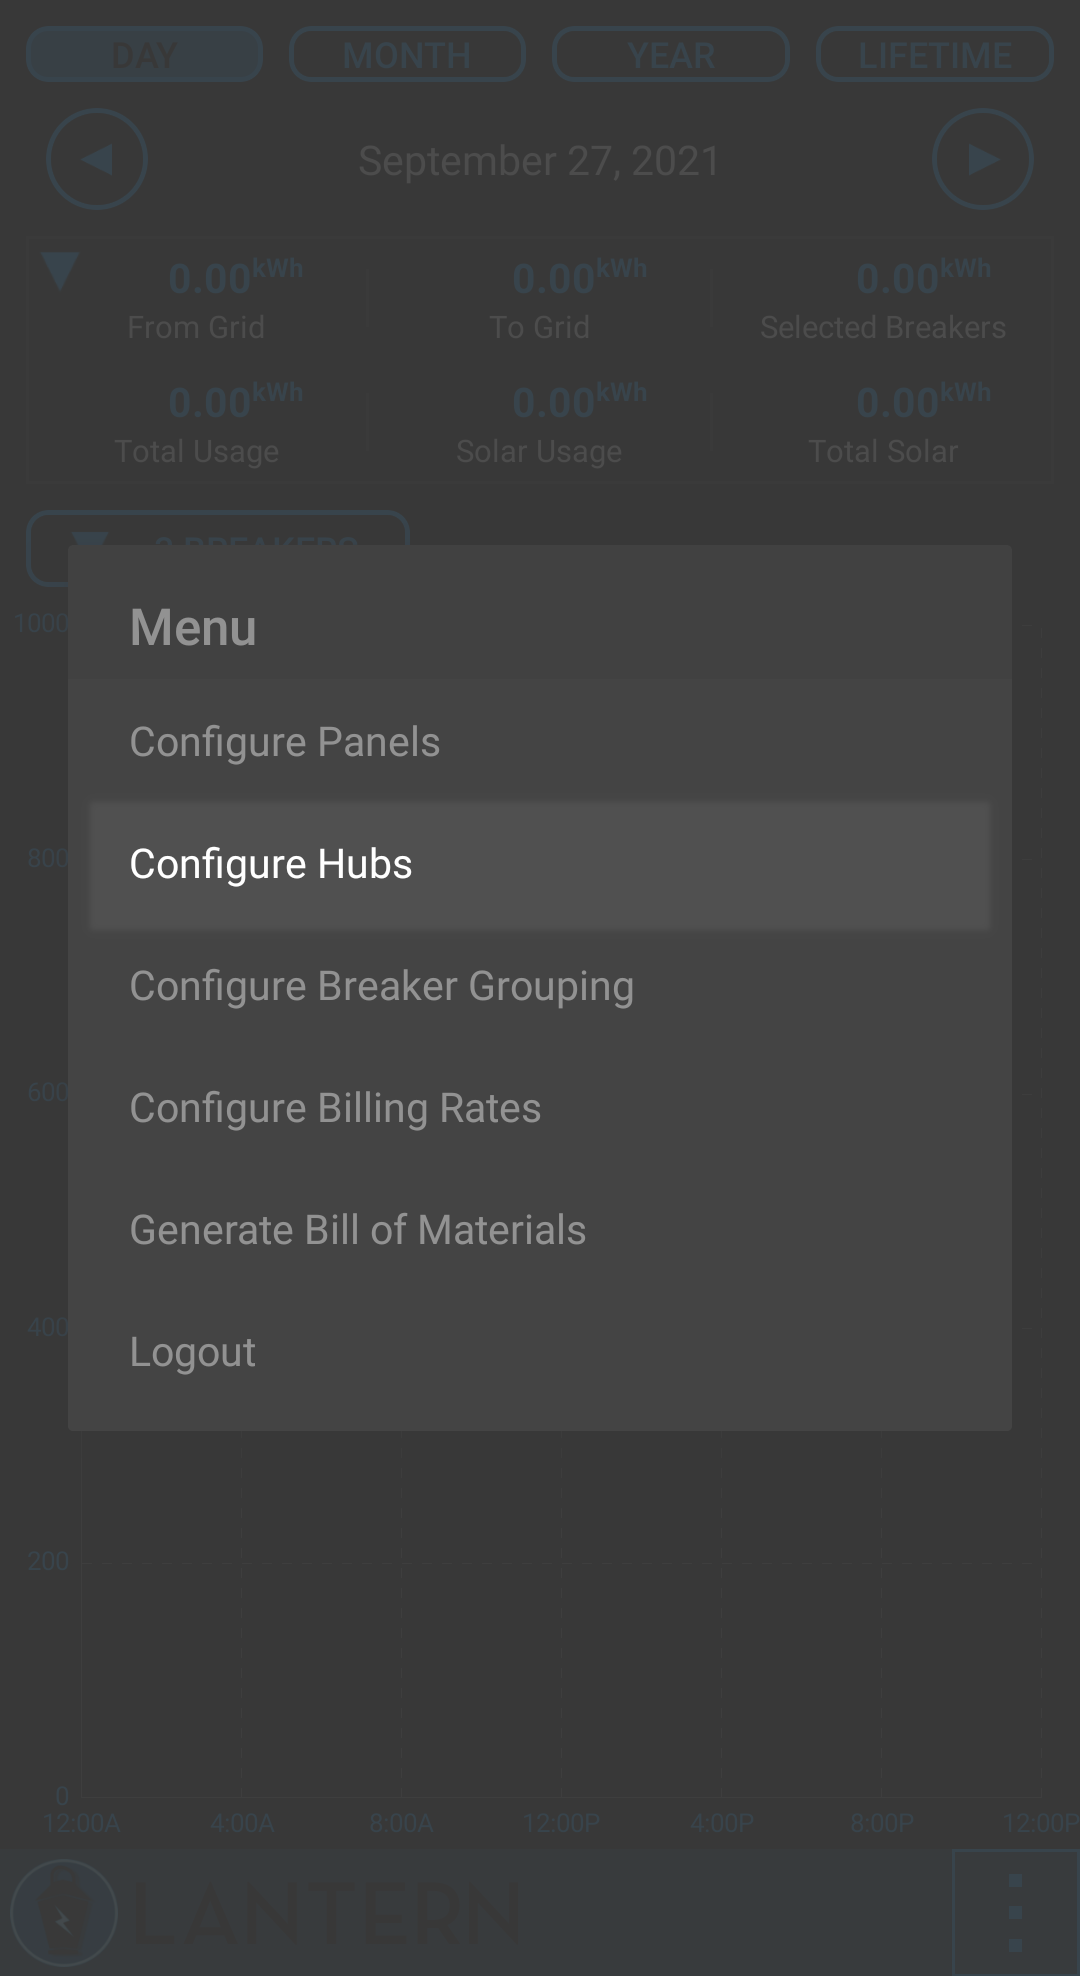
After selecting "Configure Hubs" from the main menu, you'll be brought to a view which lets you know that the app is scanning for your hub. It may prompt you to turn on your bluetooth if it's not turned on. It should find your hub within 10 seconds if it's fully booted and nearby. After it finds it, the light on the side of the hub will blink twice per second until you take an action.
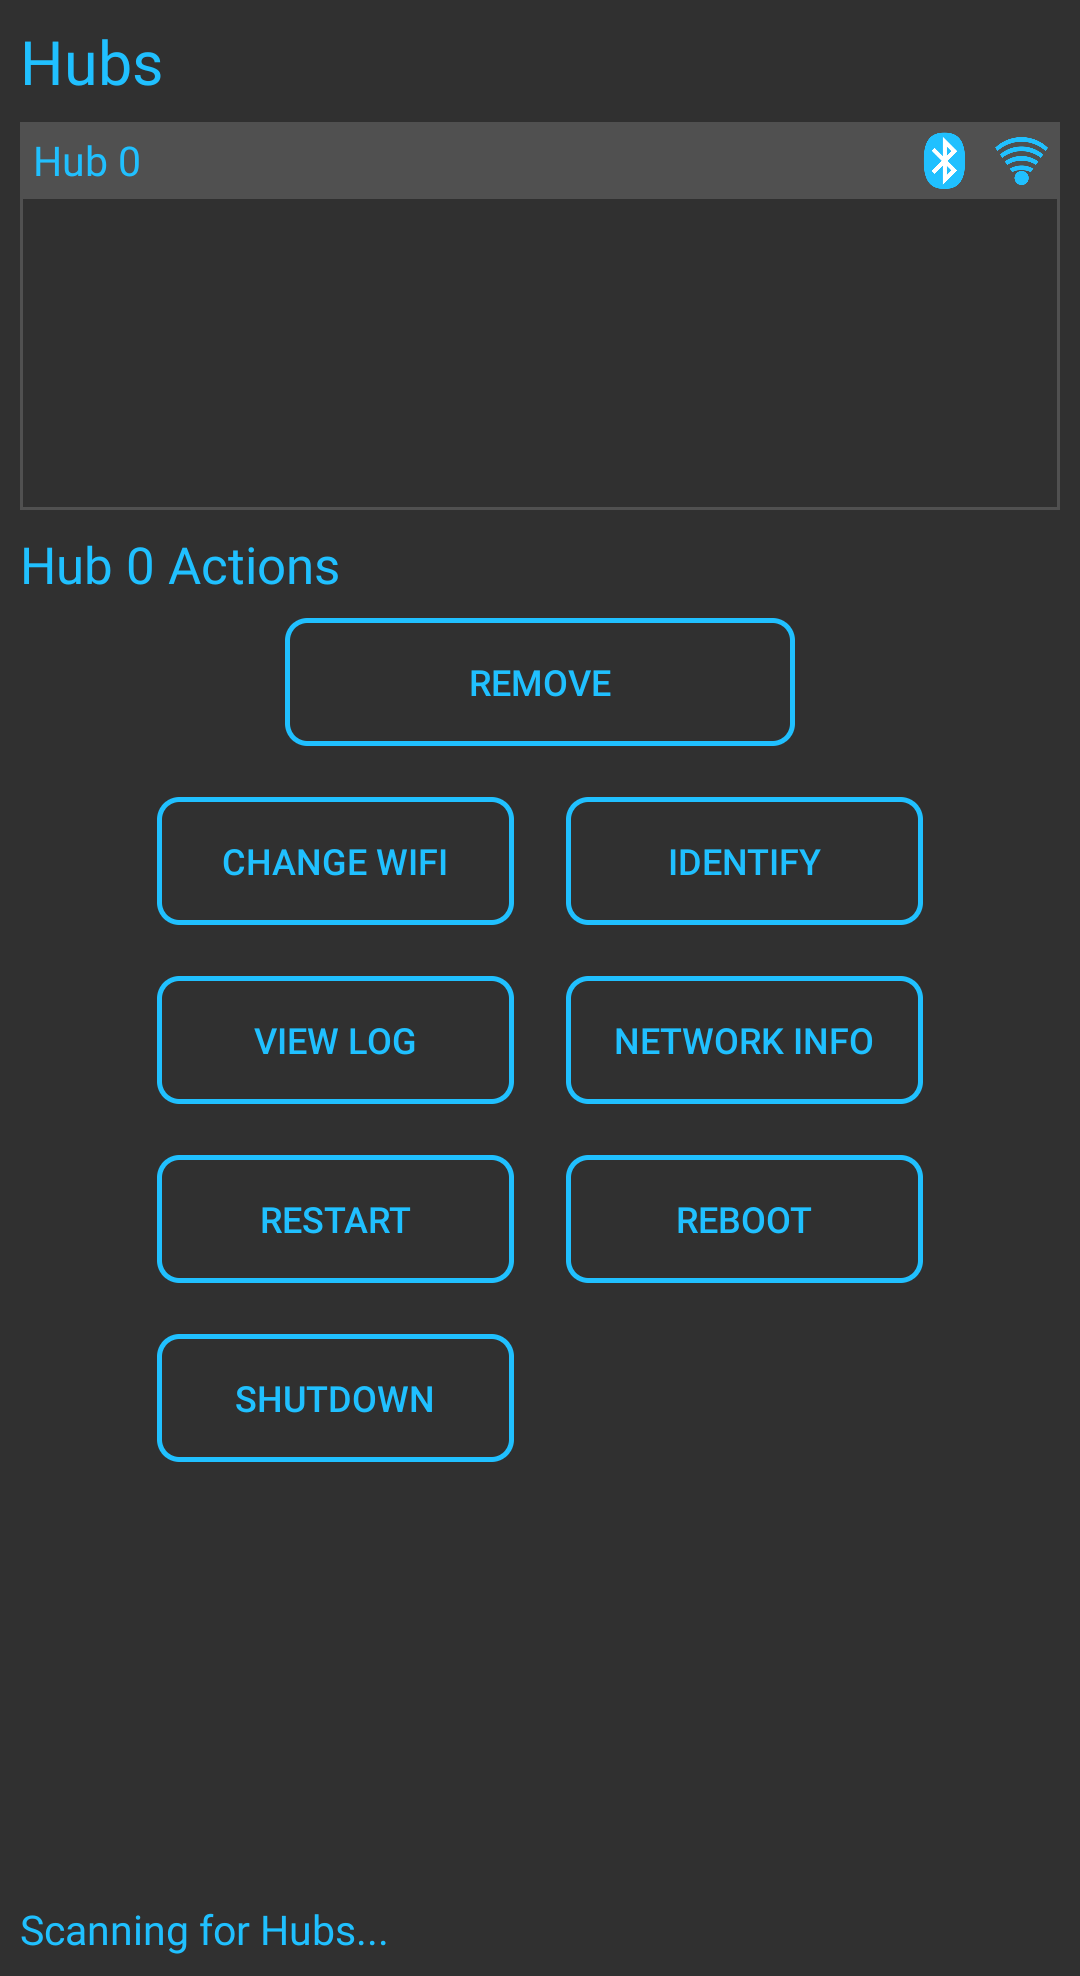
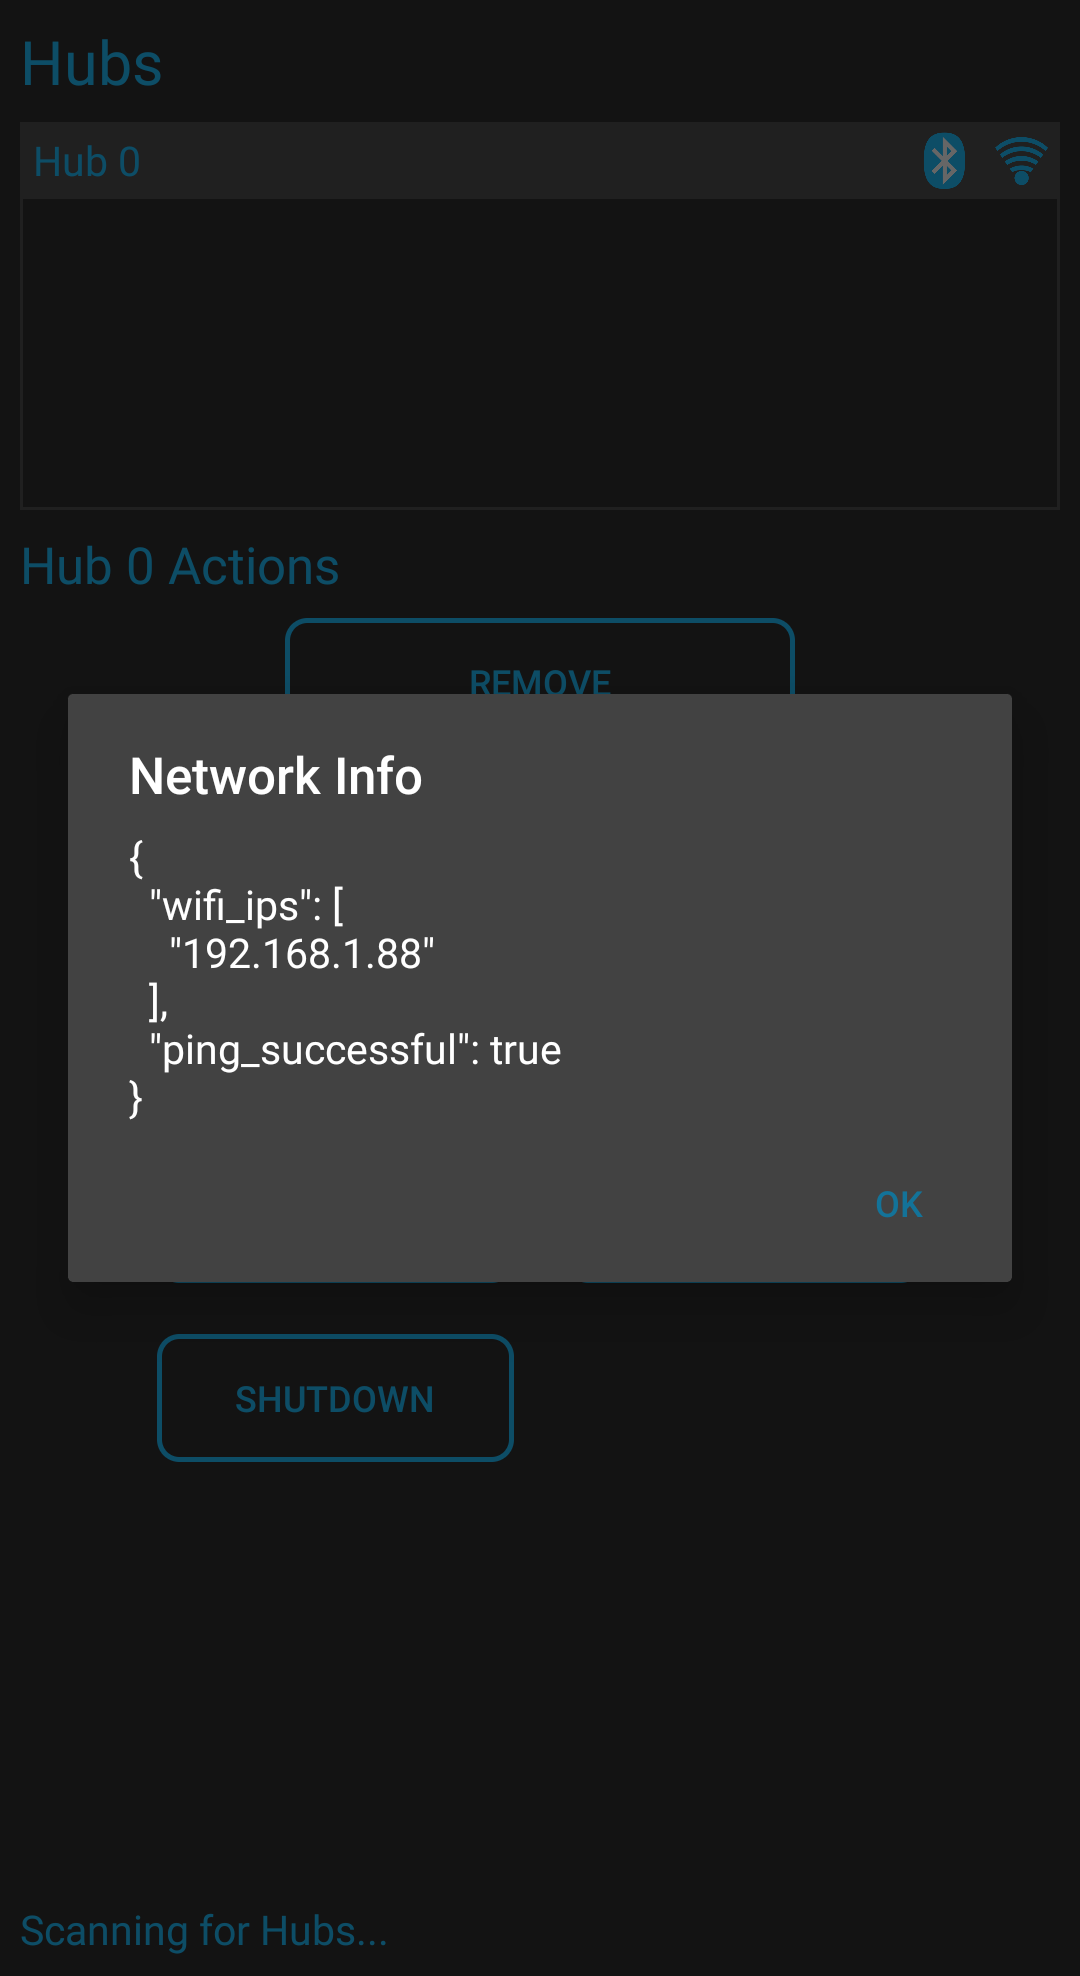
After the hub has been added and is connected via bluetooth, several options are available for control and troubleshooting. You can select "Network Info" to see the IP of the hub and you can use that to SSH into the hub if needed. The default username is pi and the password is LanternPowerMonitor.
Hub Calibration
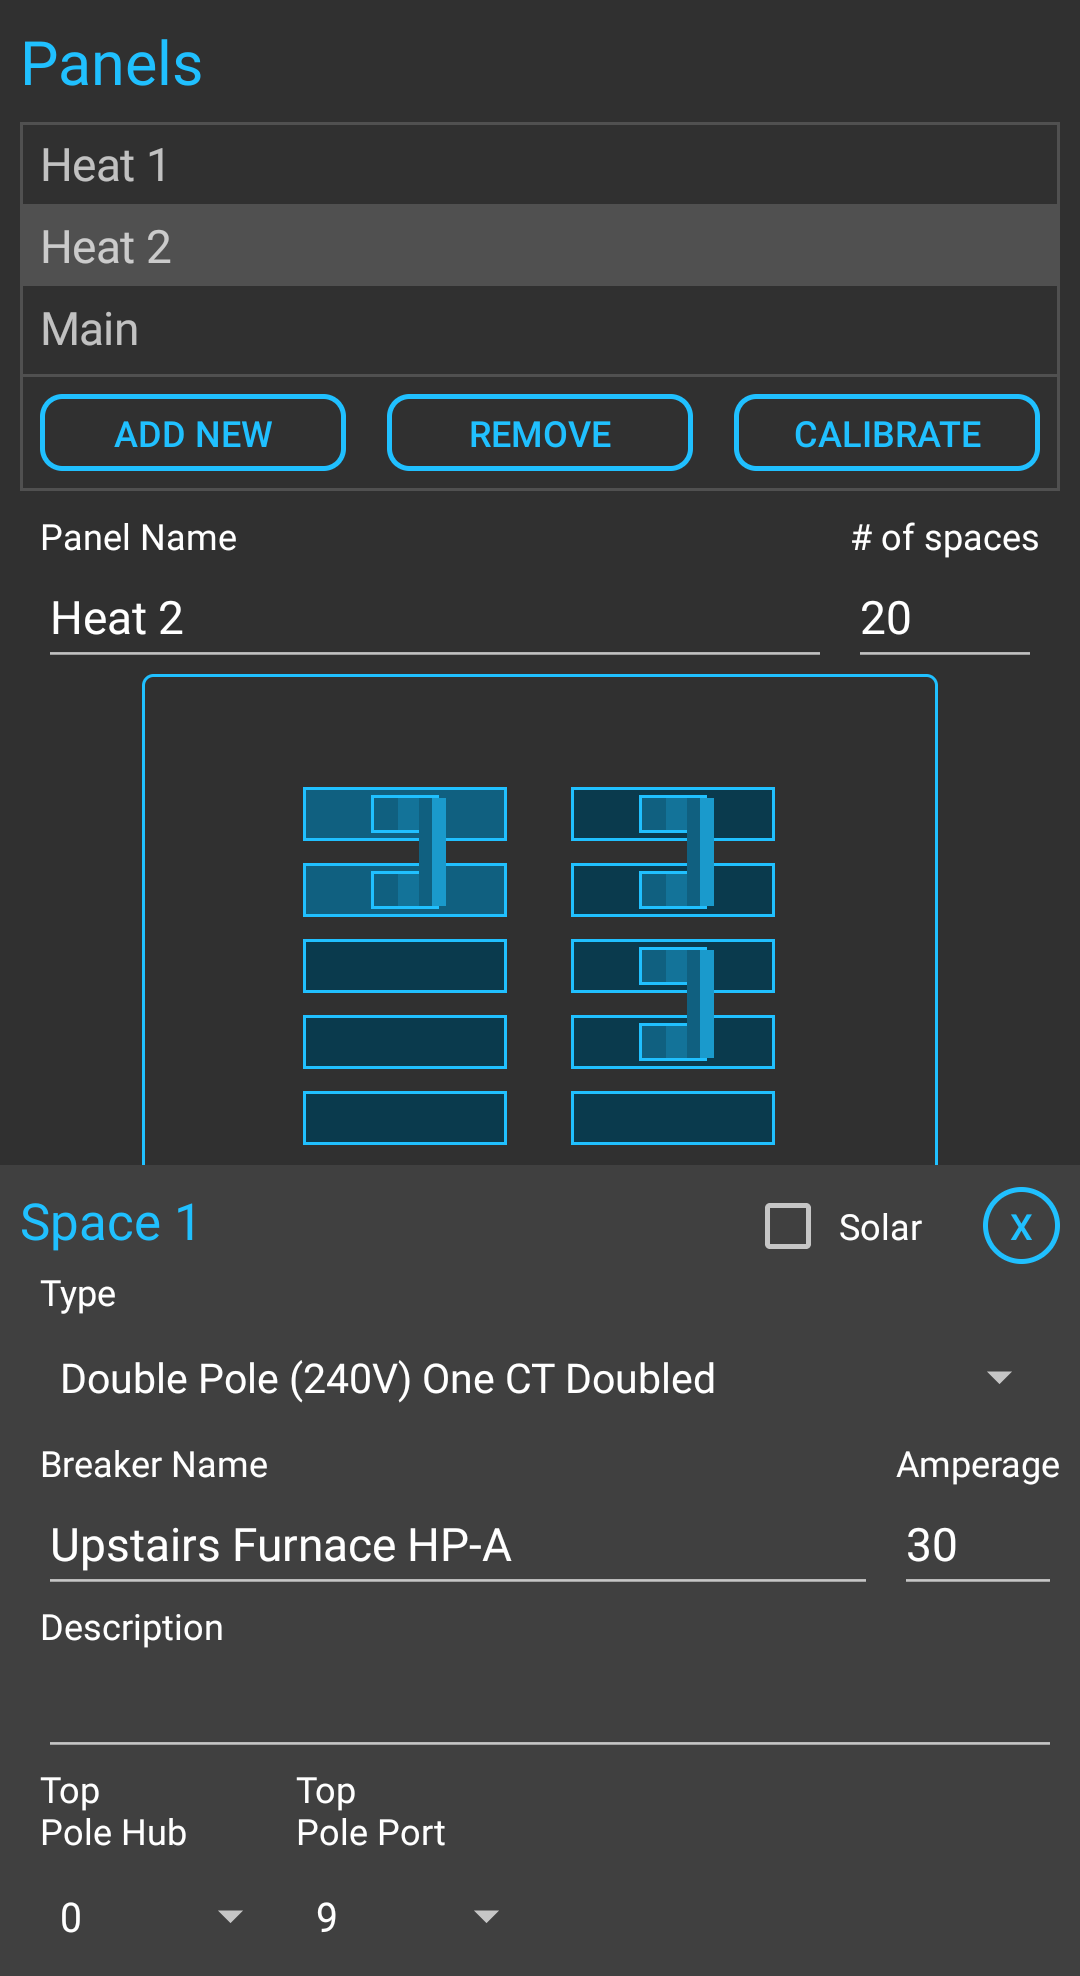
Now that your hub has been added, you can go back into your panel and assign the hub and port numbers for each space. Hopefully you taped your CTs with space labels so matching the port to the space is easy.
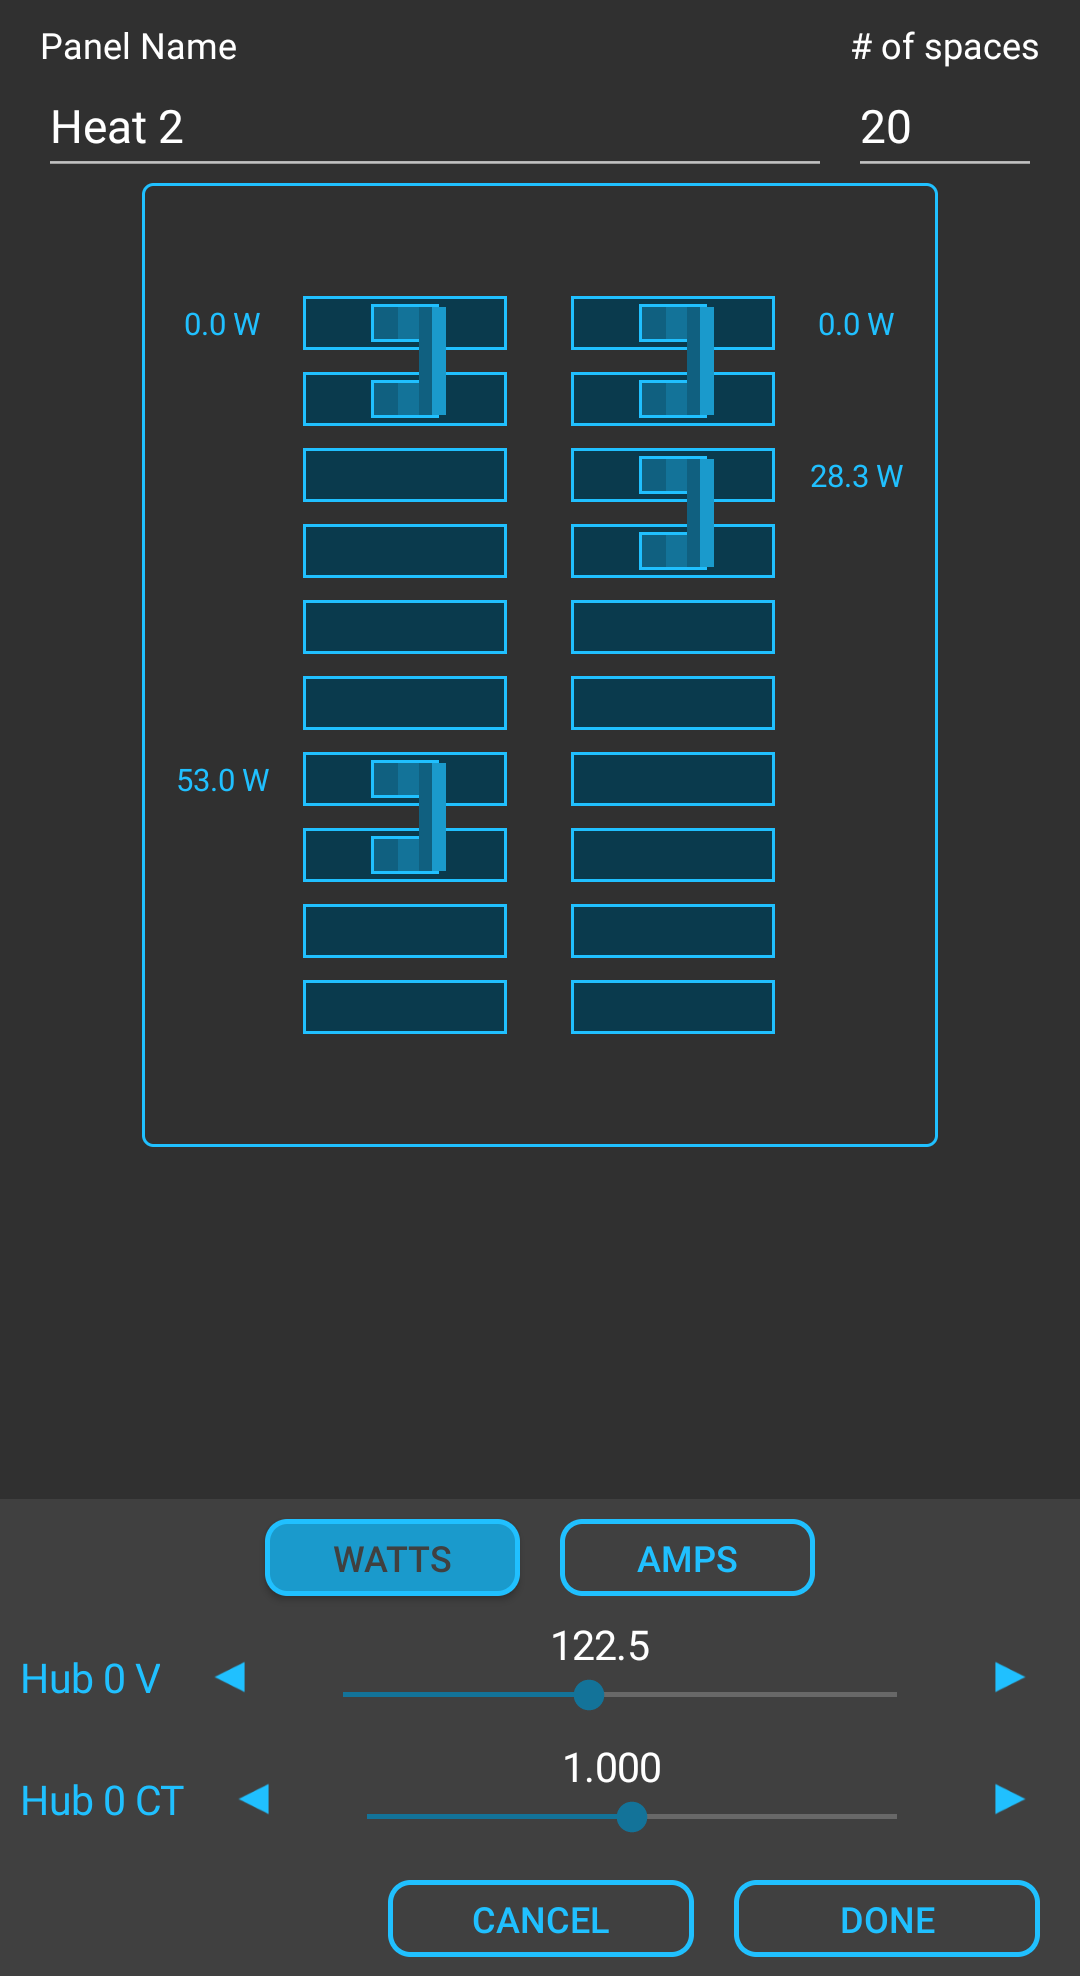
With all of the CTs and the VT hooked up, you need to restart the hub so it picks up the changes. After restarting the hub, you can select "Calibrate" in the panel config. You will be shown real time data of the power of each breaker and the voltage of your mains.
You must calibrate the voltage first. Measure the voltage in an outlet near the panel using a multimeter. Adjust the slider until it matches the voltage reading from your multimeter. Then, using a clamp meter, measure the amperage or power of one of the breakers (one known to be currently using power, plug in a hair dryer or lamp or something). Adjust the slider for the CT calibration until the power reading of the breaker matches what your clamp meter reports.
Now restart your hub one last time so it picks up the calibration change.